
Why you need DR-as-a-Service (DRaaS)
for OKE Cloud
RackWare SWIFT fully automated solution allows you to enable backup and DR between your OKE setups across regions. SWIFT uses DR policies to plan scheduled backups of your OKE workloads. In the event of any type of extended outage, RackWare SWIFT allows you to failover your workloads into that geographically remote cloud location and be up and running in minutes.
This blog walks you step-by-step through how to get started with SWIFT to protect your OKE workloads.
Step 1:
Login to your Oracle Infrastructure account and from Oracle Cloud Marketplace, launch RackWare SWIFT instance by selecting the required version and compartment.
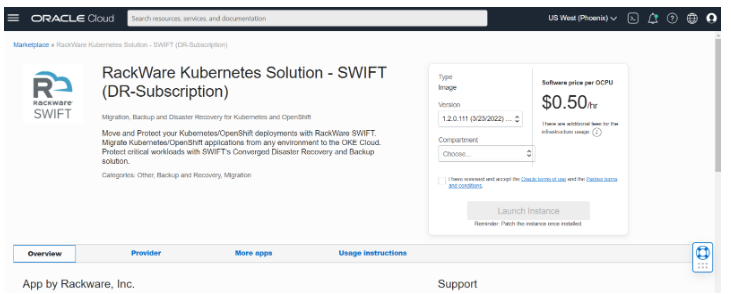

Provide all the required instance parameters and click on Create button to launch the instance.
Step 2:
Once the instance is Running, connect to the instance (for additional steps, click here ). Login to the SWIFT server (over SSH) and run the following command to set password for 'admin' user.
sudo swiftcli user modify admin --password <password>
or contact your Org-Admin to set a password for your user.
SWIFT GUI can now be accessed at: https://<public_ip_of_instance>/swift/dashboard
Step 3:
Configuring TRAIPOD (Transient Rackware Agent Image POD):
TRAI is essentially an image, which is deployed with the SWIFT product, and a user can register it under their private container registry used under the K8S. This image runs as a POD and Service combination in the user K8S (source as well as target K8S) during syncs.
TRAIPOD image, i.e., TRAI, is built with a ‘docker’ tool. Currently, it is a docker compatible image, though it should run with all known container runtimes seen with the K8S (container, docker, etc.).
The TRAI image is deployed with SWIFT. You can find it on SWIFT server at location
/opt/SWIFT/traipod/rackware-trai-docker.tar.gzLoad this image and push it to the required registry. To be able to pull this TRAI image, we need to create secrets in the source and target namespaces. The following command can be used to create the secret.
kubectl create secret docker-registry <secretname> --namespace=<namespacename> --docker-server=<registry-server-name> --docker-username=<username> --docker-password=<password> --docker-email=<email>We input this TRAIPOD image name/tag and secret name during sync for both source and target.
Step 4:
On the SWIFT GUI login page, please download and go through the Operations guide and Prerequisites/Installation guide to get a detailed step by step guidance for getting started.
Login using the user and password created in step 2.

Step 5:
The landing page will be seen as below

Step 6:
On the Container Cluster Administration page (Container Clusters tab in the left side panel), click on 'Add' button and add the OKE cluster by selecting Cloud Type as Oracle.

Fill in all the required oracle infrastructure account details and click on 'Add'.

Similarly add the target cluster to SWIFT.
Step 7:
Expand the 'Business Continuity & DR' tab in the left side panel and navigate to DR Policies page.

Step 8:
In the 'New' DR policy pop-up window, set the required sync type, schedule and email alerts for the policy to be created.

Step 9:
Once the policy is created, select the policy and click on 'Apply' button to apply the policy to a new replication. Select Start Immediately to start the syncs immediately as per the schedule or Start Later to start DR at any other time.
We can apply the policy to any existing replication or a new replication.
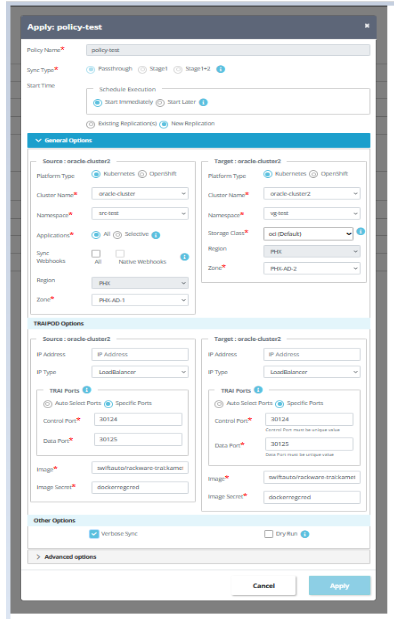
In case of new replication, provide all the source and target cluster details including control port and data port for both source and target cluster for SWIFT to use.
Step 10:
The replication will start as per the policy schedule and can be seen on the Application Replications -> All Replications page.

Step 11:
A successful replication will show replication status as 'Completed'. We have hence performed a successful

Failover and Fallback :
The failover operation is the process of switching production to a backup facility (normally your recovery site). That is, when a DR event occurs and the source site is down, the DR side needs to come in picture. In such cases, user may execute the ‘failover’ operation.
Using SWIFT, user may also perform a drill failover, to test if failover will work fine on the occurrence of actual disaster.
A fallback operation is the process of returning production to its original location after a disaster or a scheduled maintenance period.
To perform a failover, navigate to the Business Continuity & DR -> DR Policies page, locate the policy associated with the source and click on the failover button:

Set the Drill failover checkbox to true to perform a test failover that is a drill failover will not do an actual failover sync.

The failover operation will do the following things
For DR policy of type ‘stage1-2’, stage2 sync will be performed if last stage1 sync was successful. If there is no outstanding stage1 to be replicated to DR< then staged syncs will be skipped.
For DR policy of type ‘PTS’, PTS sync will be executed. If sync fails, the failover operation will also fail.
After failover is performed, the state of the DR policy will be changed to ‘Failed Over’ and the subsequent scheduling of syncs will be paused.

Once the failover is completed, if the source is rebuilt, we can restore the source application with data using ‘fallback’. Click on the below highlighted fallback button for the same.

In case the policy is applied to multiple syncs, we can apply fallback for only selective syncs.
Click on the FallBack button to start the fallback. Ensure the policy is Fallen Back.

Backup syncs will continue to be scheduled as per the policy schedule. The policy state will change back to Active after a successful sync post fallback.
With these simple steps, protect your OKE workloads by making them disaster proof with SWIFT’s DRaaS solution.
Learn more about SWIFT here.
For more information please email to [email protected]